Below are the steps to make a Bar Mitzvah Torah Keepsake Gift!
The Torah is at the center of any Bar or Bat Mitzvah. One of the best things I made for my son’s Bar Mitzvah was this Torah Shadow Box Keepsake. What makes the Bar Mitzvah Torah Keepsake special is that it is open to the actual Bar Mitzvah Torah portion! My son really loved the gift and said he will treasure it always! It was easy and affordable to make and looks beautiful hanging in the living room as a reminder to the special day.
Here are the 6 easy steps to make a Bar Mitzvah Torah Keepsake:
-
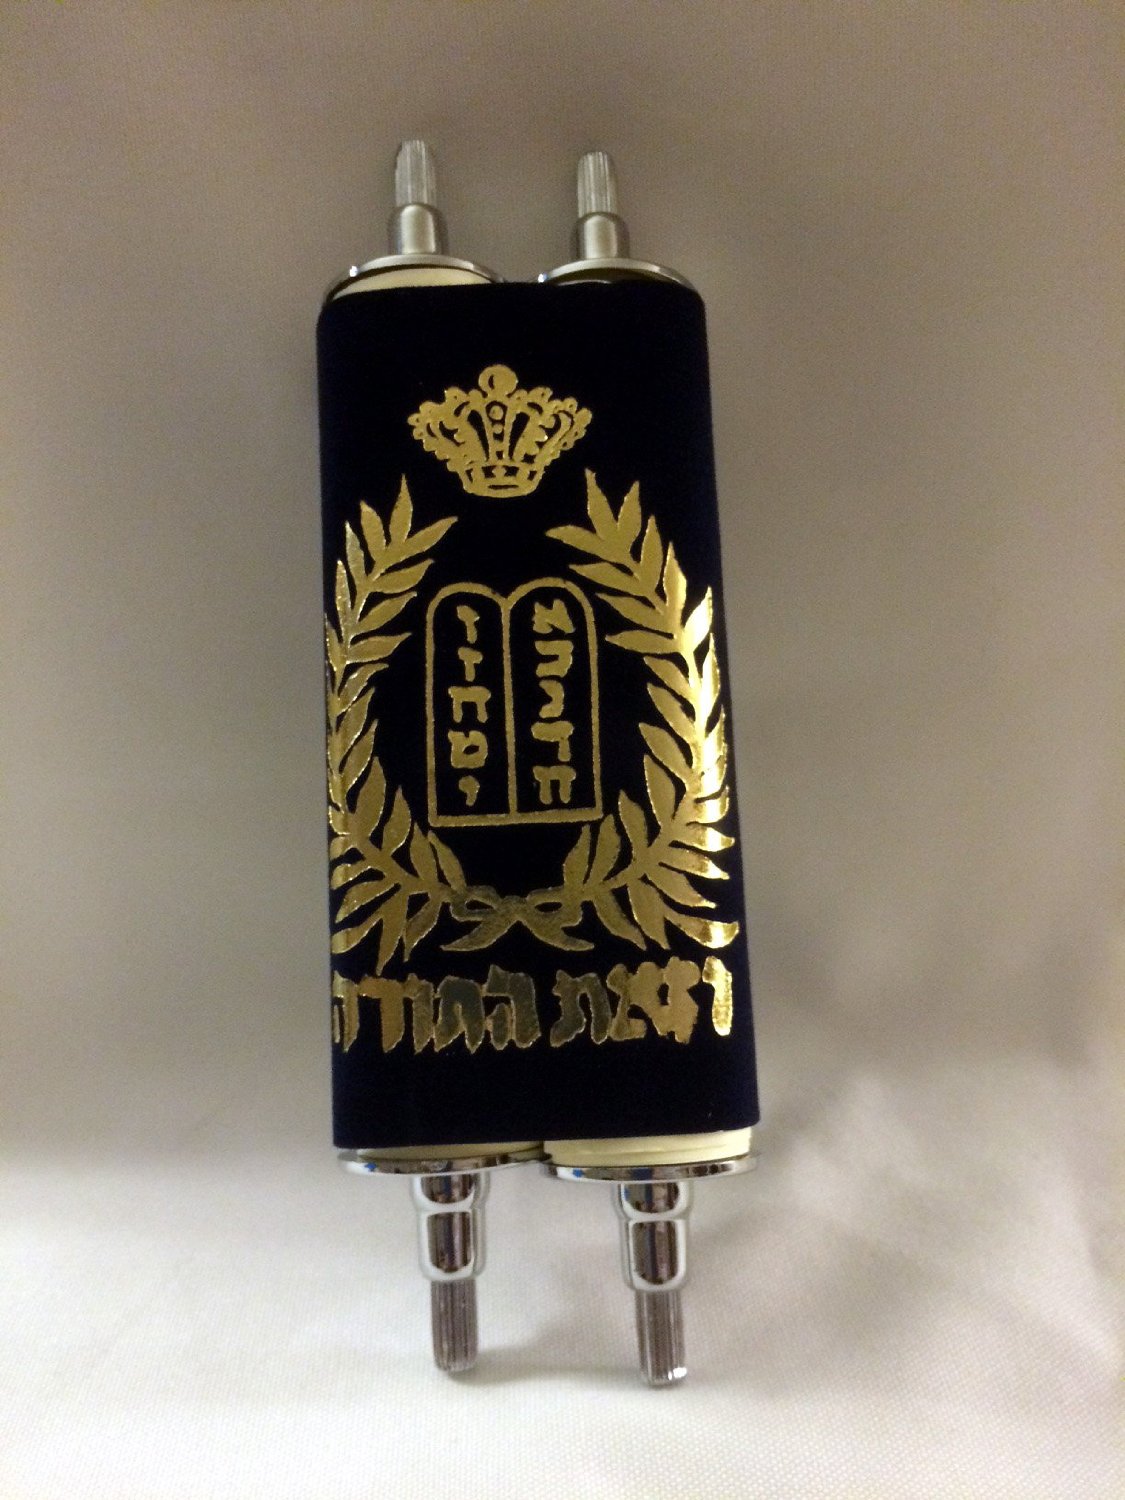
Purchase a small torah scroll. I am sure you can find them in Judaica shops but I went to Amazon and bought mine there (free shipping and I was ordering other things for the Bar Mitzvah anyway so it made more sense than driving around to find what I was looking for). They range in price on Amazon from $10-19 depending on the vendor and if they are having a sale. You want to look for something that is called “Complete Torah Scroll – Small”. The torah scroll I bought is 8″. Here is a link for one of the companies that sell the scroll (with Prime Shipping): www.amazon.com. It comes wrapped. You just remove the wrap and it will open up easily. It is so cool because it is an exact replica of a real torah!
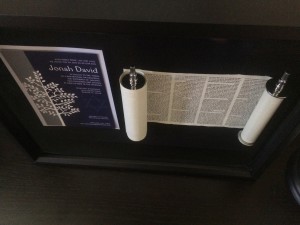
Completed Bar Mitzvah Torah Scroll Shadow Box Project 
Torah Scroll (closed and wrapped) 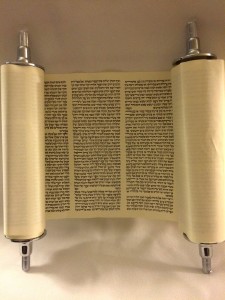
Opened Mini Torah Scroll -
Purchase a shadow box. These are easy to find at most craft stores (such as Michaels or Jo-Ann Fabrics or AC Moore or even Walmart). You want to find one that it tall enough for the scroll (so at least 10″ tall) and leave yourself room to have the scroll opened up and to have room for the invitation. So basically it should be at least 12″ – but more like 18″ to make sure it doesn’t look cramped. It is also best to find one with a black “velvet” background which makes it look so classy when it is complete. (Mine was 14″ x 18″.)
-
Purchase glue dots (I used the permanent ones rather than the removable ones because I don’t plan on dismantling the project and I want to ensure that it doesn’t fall apart when it’s hanging on the wall).
-
Gather the Bar/Bat Mitzvah Invitation that you are planning to use in your shadow box. If it is 2-sided, you can consider using 2 invitations so that you can display both sides. For that you would need a larger shadow box though.
-
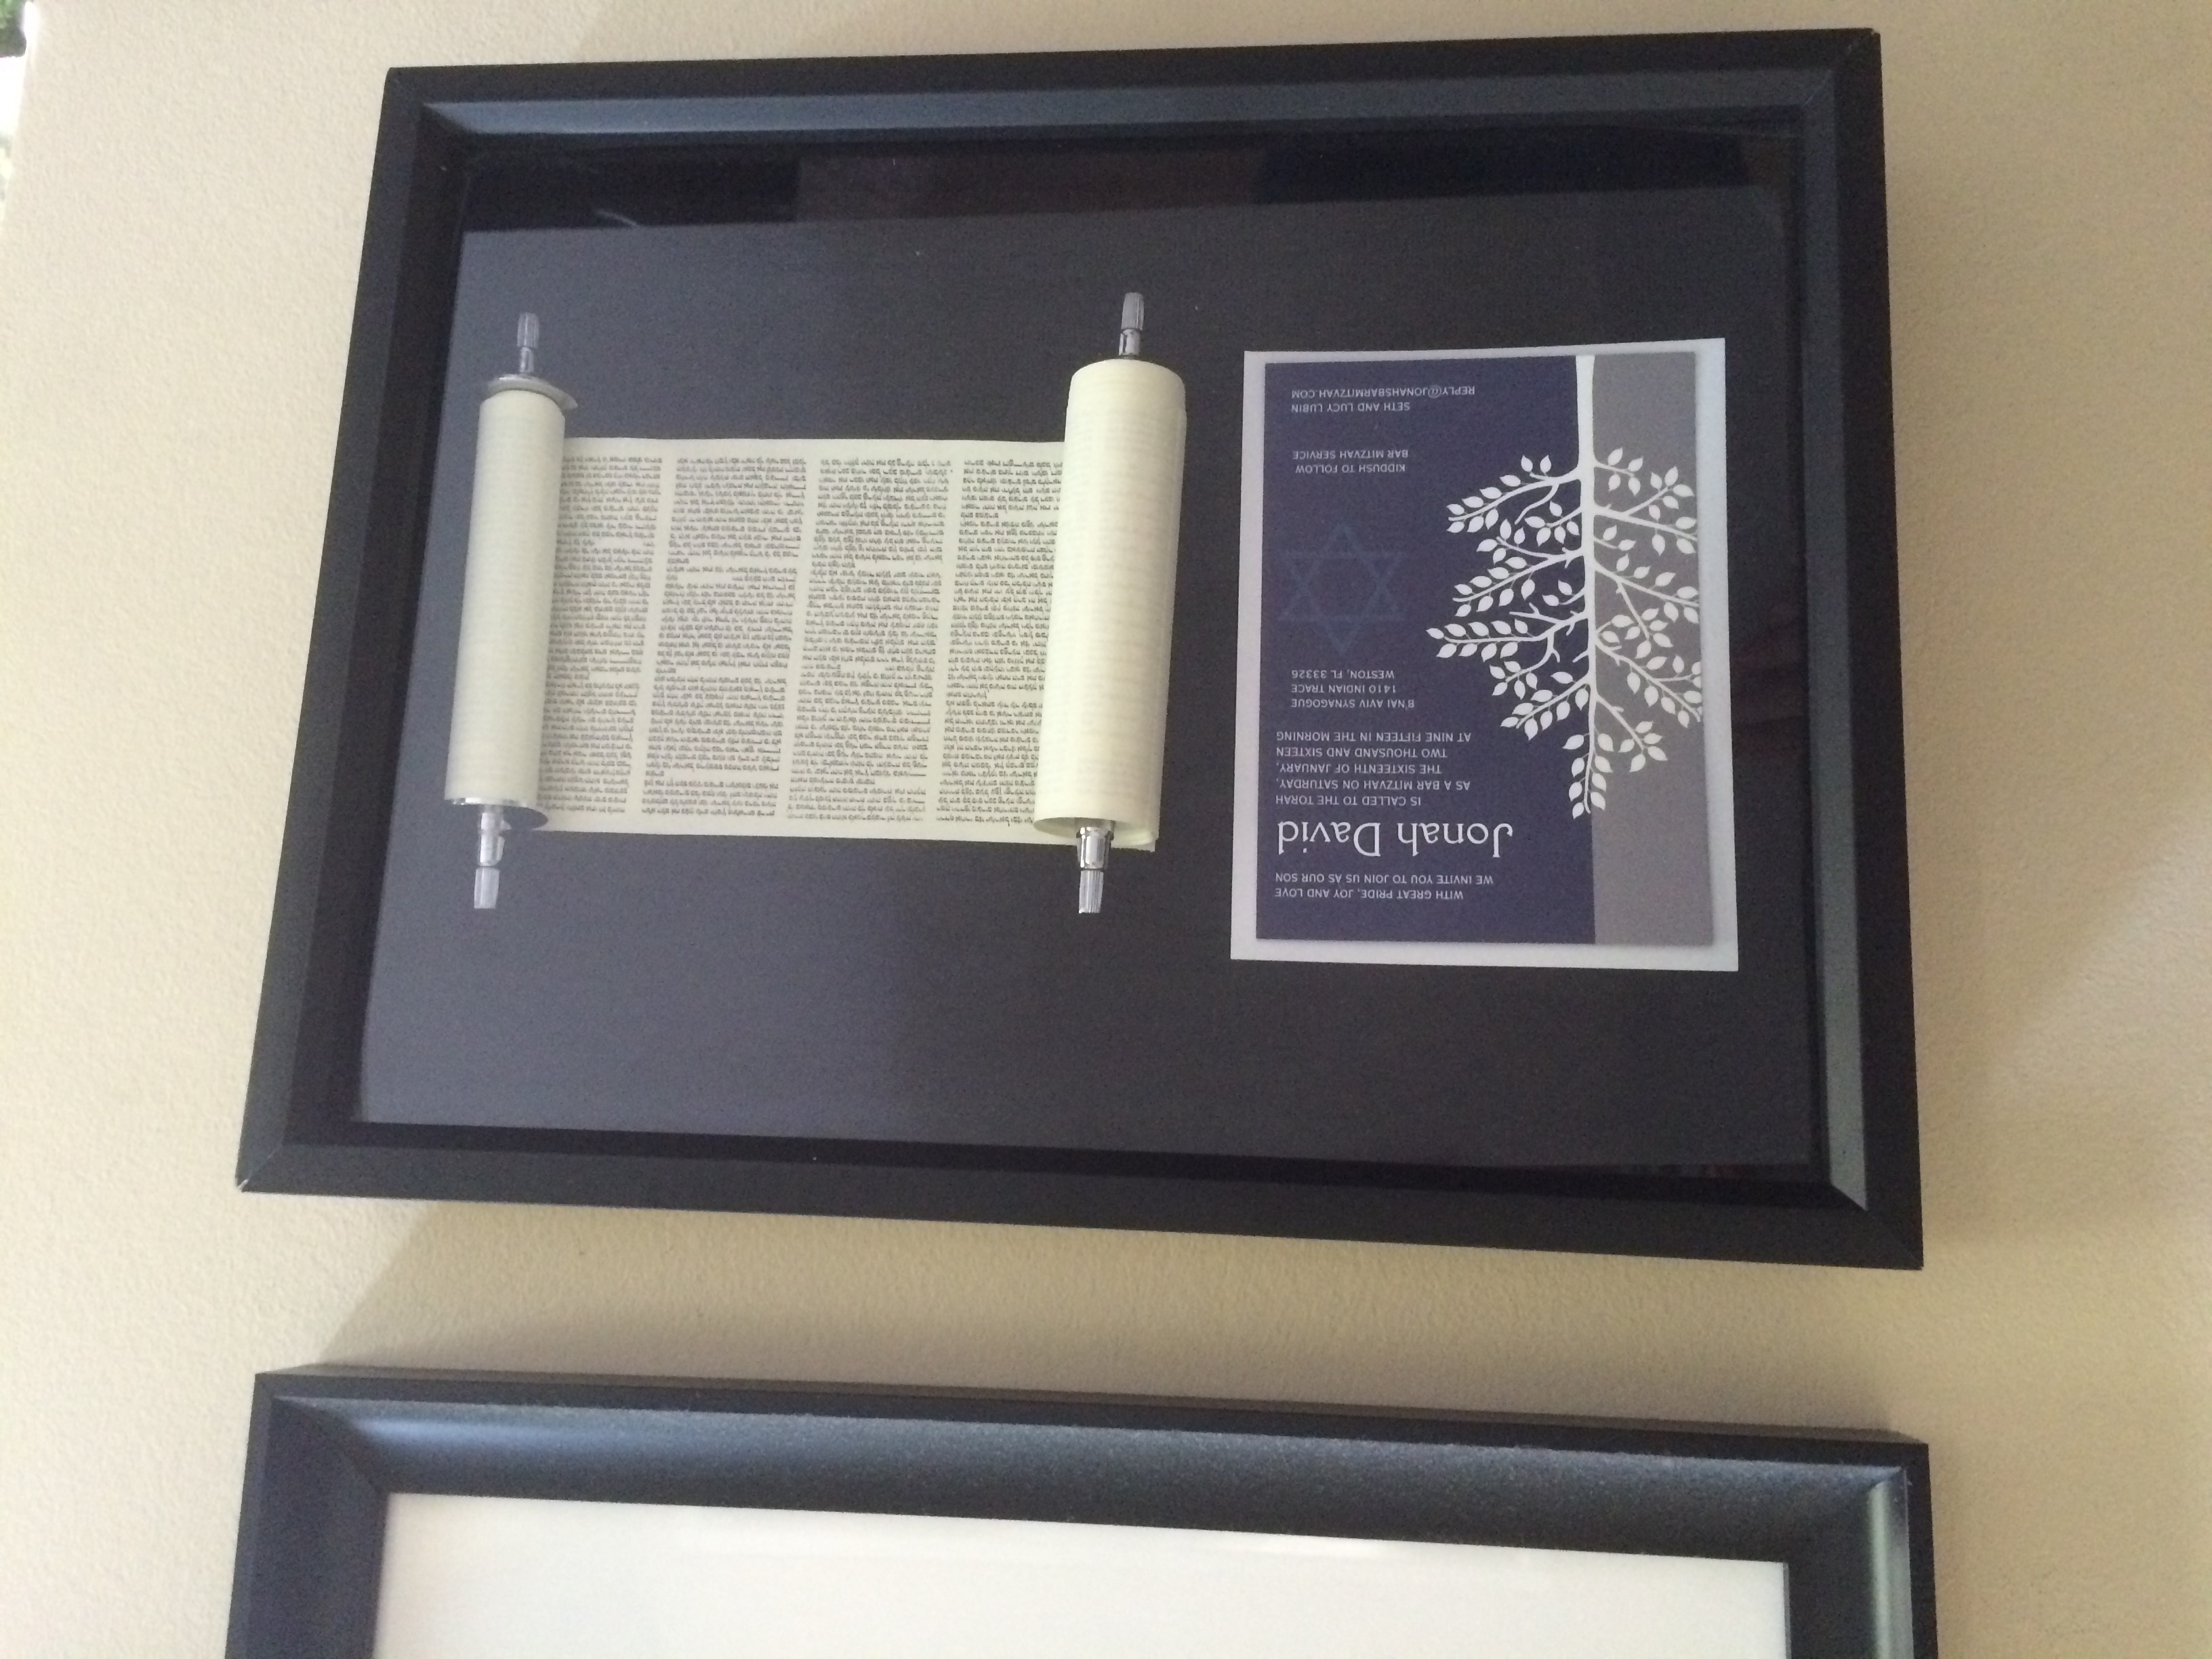
The part that makes this project so special is that the Torah portion of the Bar or Bat Mitzvah child is showing. Therefore you need to find that portion in the mini scroll or find someone who can help you. Luckily my husband could find our son’s portion (with the assistance of a magnifying glass!). We have 4 columns of text showing in our shadow box which meant that his entire Torah portion could be seen (plus a little more). Once we go to the correct portion, we didn’t want to lose it so we placed sticky notes on it to show where it started and ended just until we could get it affixed to the shadow box.
-
Open up your Shadow Box so that you are working with the surface that you will be displaying on. Once I figured out the placement (invitation on the left and Torah on the right – and landscape style), I felt comfortable taking out the glue dots to affix the invitation and torah scroll to the shadow box. I placed plenty of glue dots on the inside of the Torah so that it didn’t unravel. I learned this the hard way. I thought I had enough glue dots the first time I did it but when I put the shadow box back together and placed the frame in an upright position, the Torah scroll started to fall/unravel. So I had to open it all up again to put in more glue dots. Therefore my recommendation to you is to be generous with the dots. 🙂 You don’t want it to budge. I put glue dots behind the scroll to affix it to the black surface of the shadow box plus the glue dots inside the scroll. I also placed glue dots behind the invitation to affix it to the shadow box. I then put the shadow box back together, put it on a box, wrapped it real nice and gave it as a gift to my son on his Bar Mitzvah day.


If you are not so crafty (even though this is easy to make and I know you could do it!), you could always buy the scroll and give both the scroll (opened up to the right place) and the invitation to a framer to frame for you. That would probably end up costing more but it is personal preference. Either way it is a beautiful lasting keepsake to commemorate such an important milestone! Hope you have fun making yours! – Lucy (@soylattelucy)

Soy Latte Lucy
CEO at Soy Latte Lucy
Latest posts by Soy Latte Lucy (see all)
- Great DIY End of Year Teacher Gift! - April 24, 2016
- How to Make a Bar Mitzvah Whiteboard Animation Invitation - March 22, 2016
- Bar Mitzvah 12 Month Timeline - March 15, 2016